
It seems like every season I develop an obsession with a particular ingredient. This spring it was asparagus. The summer had me obsessed with tomatoes, and this fall was the apple. I'm going to go out on a limb and proclaim this year's holiday obsession to be gingerbread. Or maybe I shouldn't limit it to gingerbread, and just go with ginger instead. Regardless, I've been enjoying gingerbread oatmeal in the morning, cake, gingersnaps as a snack, and now these whoopie pies.
At the end of last year, The New York Times proclaimed whoopie pies to be the new cupcake. Now, I'm not sure if they can replace cupcakes, but they are a lot of fun. They have everything going for them that cupcakes do, plus they are portable and neater to eat.
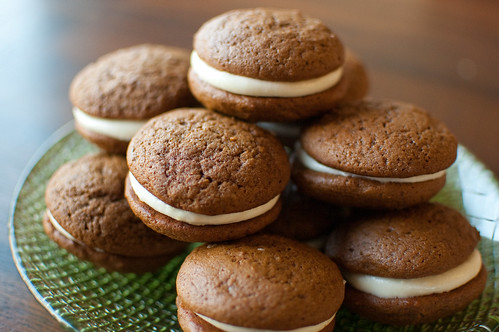
I've actually had the idea to make a gingerbread whoopie pie since this fall, and I figured that I would be able to find a recipe. King Arthur Flour, one of my favorite sources for baking, has one, but it wasn't quite what I was looking for. I had no issues adapting it to my taste though. The classic filling for whoopie pies is marshmallow, but I think cream cheese frosting makes more sense with the spiciness of gingerbread. However, when I tasted the icing with a cookie scrap, it lacked something. I added some lemon zest and extract, and the combination of the bright citrus with the spicy gingerbread was spot on. I was actually a little apprehensive about the combo because I was afraid that ginger + lemon =cough medicine, but it was really really delicious. So much so that I had to get these out of my house asap. I took a few to my in-laws, gave some to my sister-in-law, then donated the rest to my friend Michelle and her family. Only once I got home, I was profoundly sad that I hadn't saved an extra for myself. Oh well, I guess I will just have to make another batch...
Gingerbread Whoopie Pies with Lemon Cream Cheese Filling
adapted from King Arthur Flour
- 3 3/4 cups all-purpose flour
- 1 tsp salt
- 1 tsp baking soda
- 1 1/2 tsp ground ginger
- 1 1/2 tsp ground cinnamon
- 1/4 tsp ground cloves
- 1/4 tsp ground nutmeg
- 3/4 cup unsalted butter, softened (1 1/2 sticks)
- 3/4 cup lightly packed brown sugar
- 1 egg
- 3/4 cup molasses
- 3/4 cup buttermilk
adapted from Cream Cheese Frosting
- 12 ounces cream cheese, cold
- 8 Tbs unsalted butter, softened
- 1 tsp vanilla extract
- 1 tsp lemon extract plus more as desired
- zest of 1 lemon
- 3 3/4 -4 cups confectioners' sugar, sifted
In a medium bowl, whisk together the flour, salt, baking soda, and spices. In the bowl of a stand mixer fitted with a paddle attachment, cream the butter and sugar at medium speed until light and fluffy. Mix in the egg, beating until incorporated, scraping down the sides of the bowl if needed.
With the mixer on low speed, mix in half the dry ingredients. Add the molasses, then the remaining dry ingredients. Finally, add the buttermilk, mixing until just incorporated.
Use a medium cookie scoop or a pastry bag fitted with a round tip to form the cookie shapes on the prepared baking sheet. Space the cookies a few inches apart, and bake 9-12 minutes, rotating the cookie sheets halfway through, until the cookies are cooked through and spring back when lightly pressed with your finger.
Remove from oven and allow to cool 5 minutes, then transfer to a wire rack to cool completely. Repeat with remaining dough.
Meanwhile, make the filling. In the bowl of a stand mixer fitted with the paddle attachment, cream the cream cheese and butter until smooth and creamy. Add the vanilla, lemon extract, and lemon zest, and mix to combine. With the mixer on low speed, slowly add the sugar. Once it is incorporated, increase the speed to medium and beat until light and fluffy.
Match the cookies together by size, and pipe or spread filling over half the cookies. Form sandwiches with the remaining halves, and serve or store in an airtight container.


